The Minecloud Web App
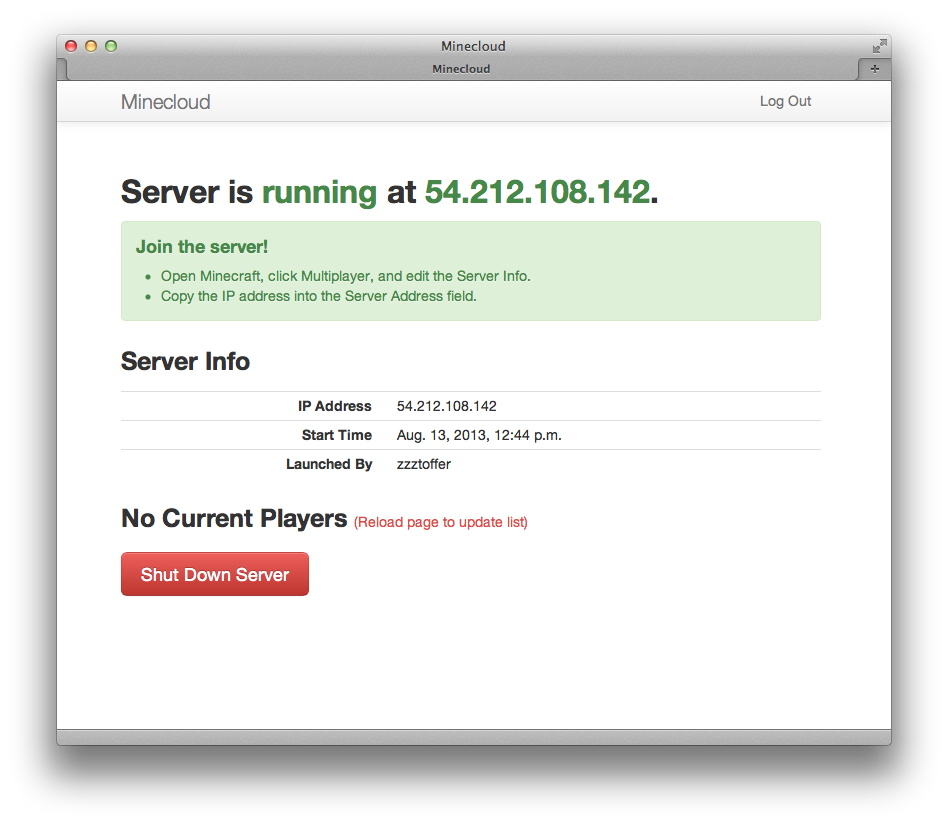
The Minecloud server is running!
In the Introduction post, I described the workflow of the Minecloud web application. (You know...click the button to start the Minecraft server, click it again to stop it.) And in the second post, I talked about all the hard work of creating a custom AMI that would automatically handle the management of the Minecraft server.
Now, I'm going to descibe the nitty gritty of the Minecloud web application in three main sections. (Code can be found here.) First, I'll give a quick overview of the rather standard Django parts of the app. Second, I'll talk about how to notify the user about the state of the Minecraft server. And third, I'll discuss how to manage the communications between the web app and the Minecraft server.
I. It's a Django App
From the user's point of view, the Minecloud web application consists of just a single page that shows the current status of the Minecraft server. While the app is simple enough that it doesn't really need a full-fledged Web framework, I decided to use Django anyway, because it made it fairly easy to handle the key pieces I needed: user accounts and authentication, and running background tasks.
User Accounts and Authentication
Every user in the Minecloud Web application is allowed to start and stop the Minecraft server. The site is password-protected, of course. (I don't want to give just anyone on the Internet the ability to run up my Amazon EC2 bill.) In addition, each user is categorized as either a "normal" user, or a "staff" user, and those roles are mapped to different roles in Minecraft. A "normal" user is permitted to play on the Minecraft server, while a "staff" user can both play and act as an "ops" on the server.
Running Background Tasks
In the best of circumstances, launching an EC2 server takes 1-2 minutes. While that's fast when you compare it to how long it took to provision a server in the past, it's not speedy enough to do in the course of a single Web request. Instead, the standard Django solution to this problem is to receive a request to perform a task (like launch a server), then place that job on the Celery task queue to run in the background, and finally redirect the user to a new page.
From the view function for launch, you place the task on the queue like so:
def launch(request):
    ...
    tasks.launch.delay(instance.id)
    return redirect('mcl_index')
Here's a snippet of the task definition for launch:
@task
def launch(instance_id):
    # Skipping the part where I assign values to ec2_ variables
    ...
    # Launch EC2 instance
    region = boto.ec2.get_region(ec2_region)
    conn = boto.connect_ec2(region=region)
    reservation = conn.run_instances(
                        image_id=ec2_ami,
                        key_name=ec2_keypair,
                        security_groups=ec2_secgroups,
                        instance_type=ec2_instancetype,
                        user_data=ec2_userdata)
    server = reservation.instances[0]
    while server.state == u'pending':
        time.sleep(5)
        server.update()
    ...
II. Notifying the User
By launching the EC2 server in the background, I've prevented the Minecloud Web app from hanging and being non-responsive. The next problem to solve was notifying the user that the Minecraft server is up and running.
When Can I Start Playing?
How will the Web interface know when the background task has completed its work? Conceptually, there are four main ways for a Web page to check the status of a background job in order to update itself:
Refresh periodically. Simply reload the page every 30 seconds or so.
Polling. Use javascript to poll the server for new information.
WebSockets. Establish a two-way channel for communication between the browser and server.
Server-Sent Events. Create a one-way communication channel that allows the server to stream updates to the browser.
While WebSockets get most of the attention in discussions about the "Real Time Web", I reluctantly ruled them out since Heroku currently doesn't support WebSockets. Upon further reflection, it became apparent that the two-way nature of WebSockets would have been overkill for my purposes anyway. Once a user of the Minecloud web app clicks the "Wake up Server" button, they should see the server's progress as it moves through the different states: "pending" to "IP address assigned" to "running." That only requires one-way communication from the server to the browser.
As for refreshing or polling, well, that felt kind of old-school, so I decided to check out Server-Sent Events as a solution for notifications.
Problems With Django Server-Sent Events on Heroku
Through this helpful blog post on Django push, I found the django-sse application, which looked like it was the perfect solution for providing updates to the web app user. To use it, you define an iterator that continually yields the data you want to push to the browser. Even better, django-sse provides a helper that can subscribe to a Redis Pub/Sub channel and push each message that is published.
Django-sse worked perfectly in development, but as soon as I started testing it on Heroku, I noticed two problems:
Limited Supply of Redis Connections
Each browser connection to the django-sse endpoint not only requires a long-standing connection to the web server, but also requires a long-standing connection to the Redis server. Now, a Minecloud web app is designed to only serve a handful of people at any one time, so it never occurred to me to worry about running out of connections, but when your goal is to run the app completely for free, that's exactly what happens.
Heroku doesn't provide Redis as one of their core offerings, but several companies offer it as one of the many available add-ons. These add-ons are generally structured in a way so that you can get started with them for free, but they are severely limited. These limits can be size of data, or amount of traffic, or most relevantly for the Redis add-ons, number of connections. If you want to raise these limits, you pay a monthly fee.
But, if you want to use the RedisToGo add-on and don't want to pay, you're limited to 10 connections, and that's just not enough.
Django-sse Views Never Die on Heroku
Heroku has a vitally important, if somewhat cryptic, line in their documentation on streaming responses:
"If you’re sending a streaming response, such as with server-sent events, you’ll need to detect when the client has hung up, and make sure your app server closes the connection promptly."
Unfortunately, detecting a client disconnect does not appear to be possible when sending a streaming response with Django. (Though I would love to be corrected on this point! I queried the Stack Overflow crowd, but never got a response.) If you read through the Django docs on StreamingHttpResponse, you notice that the use case they are solving is streaming large, but finite, responses, like giant CSV files. They expect the response to end, not return a stream of data that runs to infinity.
When running on Heroku and the client hangs up, the Django app doesn't notice, so the
StreamingHttpResponsecontinues running, spewing data to no one. Not only does this consume memory, but if the view producing the streaming response has a connection to a Redis server, that precious, limited connection never gets released.
My Server-Sent Event Solution
Since I was unable to get around the limited number of Redis connections, I decided that the server-sent events view would need to poll for updates, rather than subscribe and listen for new data. And, since a Django view streaming infinite data never dies, I needed one that would self-destruct after a timeout period.
Let's walk through how my solution works. The first building block is an EventReader base class that defines an iterator that yields data that is produced by the read_events() method. Notice that the iterator checks the timeout value, so it knows when to stop running. Plus, it also respects a sleep_interval value, to control how frequently the read_events() is called.
Lastly, I define a close() method, which is where I release connections (database, Redis, etc.) that I no longer need. According to the WSGI spec, the server calls the close() method at the completion of the request, whether it completes normally, or terminates due to an error.
class EventReader(object):
    """
    Iterator that yields events to be consumed by an SSE object.

    EventReader is a base class. To do anything useful, you must
    implement a read_events() method that will actually get events.
    Some possibile sources for events: polling memcache for updates,
    subscribing to a Redis Pub/Sub channel, listening for Postgres
    notifications.

    EventReader also provides options for:

        * Timout: Rather than providing an infinite stream of events,
          EventReader can raise StopIteration after a configurable
          timeout period.

        * Sleep interval: Setting sleep_interval allows for a pause
          between event readings. It's not necessary if you are listening
          for events, but it's useful if you are polling for updates.

    """
    def __init__(self, timeout=30, sleep_interval=3):
        self.start_time = time.time()
        self.timeout = timeout                  # In seconds, or None.
        self.sleep_interval = sleep_interval    # In seconds, or None.

    def read_events(self):
        """Customize this method to read events."""
        raise NotImplementedError

    def __iter__(self):
        for event, data in self.read_events():
            yield event, data

            if self.timeout:
                running_time = time.time() - self.start_time
                if running_time >= self.timeout:
                    self.close()
                    raise StopIteration

            if self.sleep_interval:
                time.sleep(self.sleep_interval)

    def close(self):
        """Clean up any connections here (DB, Redis, etc.)."""
        pass
In Minecloud, I read events by polling the Django cache (though it could just as easily query the database), so to implement this, we create the CacheReader class by subclassing EventReader and define the cache reading logic in read_events. Notice the lack of a close() method, since reading from the cache doesn't require any connections.
class CacheReader(EventReader):
    """EventReader that fetches events by polling Django cache."""

    def __init__(self, key, default_value='', *args, **kwargs):
        self.key = key
        self.default_value = default_value
        super(CacheReader, self).__init__(*args, **kwargs)

    def read_events(self):
        while True:
            default = json.dumps([self.key, self.default_value])
            item = cache.get(self.key, default)
            event, data = json.loads(item)
            yield event, data
Now that I have the EventReader in place, my next step is to create a new SSE class, called SelfUpdatingSse that works somewhat differently from the original SSE class that django-sse uses.
First, I wanted it to act as an iterable that continually updates its own buffer using an EventReader. The original SSE class would iterate through everything in its buffer, but it relied on outside mechanism for adding items to the buffer.
Second, I defined a close() method, which calls self.event_reader.close().
class SelfUpdatingSse(Sse):
    """
    Iterable object to be passed to StreamingHttpResponse.

    Though SelfUpdatingSse is derived from the Sse class, it is used
    differently. In the base Sse, __iter__() yields everything stored
    in the buffer, then stops. In SelfUpdatingSse, __iter__() will
    continually refresh its buffer by reading new events with
    self.event_reader and continually yield them.

    Because it yields all events, the SelfUpdatingSse object can itself be
    passed as the iterator to StreamingHttpResponse, rather than creating a
    separate iterator to read the events from the Sse object.

    Plus, we can add a close() method, which will allow us to clean up any
    connections necessary for reading events.

    """
    def __init__(self, event_reader, *args, **kwargs):
        self.event_reader = event_reader
        super(SelfUpdatingSse, self).__init__(*args, **kwargs)

    def __iter__(self):
        for event, data in self.event_reader:
            self.add_message(event, data)
            for item in self._buffer:
                yield item
            self.flush()

    def close(self):
        """
        Clean up at the end of the Web request.

        This is called by the WSGI server at the end of the request and
        allows the reader to close any DB or Redis connections, as necessary.

        """
        self.event_reader.close()
With these changes in place, a SelfUpdatingSse object is now suitable to pass directly to StreamingHttpResponse.
class SseView(BaseSseView):

    @method_decorator(csrf_exempt)
    def dispatch(self, request, *args, **kwargs):
        ...
        reader=CacheReader(timeout=45, key='instance_state',
                           default_value='terminated')
        self.sse = SelfUpdatingSse(event_reader=reader)
        self.request = request
        self.args = args
        self.kwargs = kwargs

        response = StreamingHttpResponse(self.sse, content_type="text/event-stream")
        response['Cache-Control'] = 'no-cache'
        response['Software'] = 'django-sse'
        return response
Now that I had Server-Sent Events working on the server, I switched focus to the front-end. Here, I used javascript to subscribe to the /sse endpoint, and then updated the Web page as new data was pushed.
(Well, updating the Web page is how we should do it...Instead, I opted for the simplest thing that could possibly work and simply refresh the page every time the data changes. In the future, as my javascript skills improve, I'll implement a solution that updates the page without the refresh.)
So, there you have it--a notification solution with a little bit of everything: a dash of polling (but from the view code on the server, not from the browser), a touch of page refresh (but not on a timer, only in response to new data), and a healthy dose of Server-Sent Events.
III. Communicating with the Minecraft Server
While I had solved the problem of how the web app communicates the state of the Minecraft server to the user, it did beg the question: How does the web app even know the server's status in the first place?
In fact, this question of communication between the web app and the Minecloud EC2 instance that it launches is a broader one, since a number of pieces of data need to flow back and forth between the web app and the instance.
For example, the server needs to know the AWS credentials and the name of the S3 bucket that contains the Minecraft game data. It also requires a list of names of regular players, as well as a list of Minecraft ops. Meanwhile, the web app needs to know the state of the Minecraft server. Is it still booting up? What is it's IP address? Is it ready to play? And, it needs a list of players that are currently logged in and playing Minecraft.
Since no one solution solved all of my communication challenges, I was forced to use a variety of strategies.
Cloud Init
Though its documentation is a bit underwhelming, Cloud Init is an awesome tool for scripting actions that need to be performed when an EC2 instance first boots up, and it comes pre-baked into the Ubuntu AMIs. Typical uses include running apt update, installing packages, and running commands. It works by defining commands in a userdata script that you upload as part of the process of launching an EC2 instance. Studying the example cloud-config file is the best way to get a feel for what it can do.
My usage of Cloud Init was pretty primitive. I simply defined environment variables and wrote them to /etc/environment on the EC2 instance. This way, I avoided hard-coding them into the AMIs when I created them and enabled the web app to dynamically define them when it launched the instance.
Here's what my userdata.txt template looks like:
#cloud-config

bootcmd:
 - echo AWS_ACCESS_KEY_ID= >> /etc/environment
 - echo AWS_SECRET_ACCESS_KEY= >> /etc/environment
 - echo MSM_S3_BUCKET= >> /etc/environment
 - echo DATABASE_URL= >> /etc/environment
 - echo MEMCACHIER_SERVERS= >> /etc/environment
 - echo MEMCACHIER_USERNAME= >> /etc/environment
 - echo MEMCACHIER_PASSWORD= >> /etc/environment
 - echo REDISTOGO_URL= >> /etc/environment
Database and Memcache
Notice that I set environment variables for a number of outside services, including database and memcache servers. That's because another strategy I used to pass information between the web app and the EC2 instance is to read and write to the same cache and the same database tables.
Now, I grant you that this is a pretty hacky solution. The proper way to do it is to set up an API for the web app that the EC2 instance can use to communicate. In the near future, I plan to utilize Django REST Framework to set this up.
But, for now, here's an example of how the web app and EC2 instance share the same database. When the server is booting up, one of its tasks is to query the Django database for a list of player names, and then it uses that data to write the white-list.txt and ops.txt for the Minecraft server. Once it has completed all of its initialization tasks and is ready to receive players, it writes to the launcher_instance Django database table and to memcache that the instance is running.
Redis
In almost all cases, the initiation of the communication is coming from the EC2 instance, so a Web API is the right solution. Scripts on the Minecloud server would be able to both query for and write data to the web app using the API. However, in one case, I need the EC2 instance to be listening for one specific command from the web app.
At the very end of the last post, I talked about how backing up of the Minecraft data files couldn't be completed during the time allotted for shutdown. That meant when a player clicks the "Shut Down Server" button, I couldn't just send the shutdown command using boto. Instead, I first needed to send a message to back up the data files, and then once the backup completed, send the shutdown command.
That meant I need the EC2 instance to always be listening for the "backup files before shutdown" command. So, I wrote a tiny daemon that subscribes to a Redis Pub/Sub channel and listens for a single command:
#!/usr/bin/env python

import os
import redis
import subprocess
import sys

def main():
    redis_url = os.getenv('REDISTOGO_URL', None)
    if not redis_url:
        sys.exit(1)

    conn = redis.StrictRedis.from_url(redis_url)
    subscriber = conn.pubsub()
    subscriber.subscribe('command')

    backup_cmd = ['/usr/local/venv/bin/python',
                  '/usr/local/bin/msm-manage-pre-shutdown-backup.py'
                 ]

    for msg in subscriber.listen():
        if msg['type'] == "message" and msg['data'] == 'backup':
            subprocess.call(backup_cmd)


if __name__ == '__main__':
    main()
One note about security: the Redis connection is not over https, so I don't imagine it would be hard to spoof a backup command, but the msm-manage-pre-shutdown-backup.py script queries the database to make sure that the web app originated the backup command. If it doesn't pass that check, it doesn't do anything.
Oh Mama, Can This Really Be the End?
With that, we've finally completed the three-part series about the design of Minecloud!
I'm always interested in feedback, so if you spot errors, or want to suggest a better way to do something, please contact me or submit issues on Github. Also, if you are using the Minecloud to run your own on-demand Minecraft server, I would love to hear about your experience.